

Learn all about New Zealand eSIMs, from how to get NZ eSIM and use it, to the pros and cons, plus tips for choosing the best plan for your trip. 👀
Popular New Zealand eSIM Plans 2025
- CountryNew Zealand
- Option500MB/Day
- Duration1 Day
- Standard PriceUS$2.15
- CountryNew Zealand
- Option1GB/Day
- Duration7 Days
- Standard PriceUS$11.35
- CountryNew Zealand
- Option500MB/Day
- Duration10 Days
- Standard PriceUS$11.35
What is New Zealand eSIM?
A New Zealand eSIM is a digital version of a SIM card embedded into your device. It allows you to connect to New Zealand’s mobile networks without needing a physical SIM card. By using a QR code to activate, it offers seamless connectivity for travelers and locals alike.
How Does New Zealand eSIM Work?
The New Zealand eSIM works by storing your mobile network data directly on the chip embedded in your phone or device. Once you purchase an eSIM plan from a New Zealand provider, you will receive a QR code or activation code. Using your phone’s settings, you scan the code to download the data plan, which immediately connects your device to the local network. This setup is simple and can be done before your trip, ensuring you have mobile service as soon as you land.
In addition, the eSIM makes switching between plans effortless. For example, if you're traveling from New Zealand to Australia, you can activate a compatible Australian plan without physically swapping SIM cards. This feature is particularly helpful for frequent travelers, offering flexibility and removing the hassle of managing multiple physical SIMs.
New Zealand eSIM Pricing

New Zealand plans are great for different travel durations—whether you’re visiting for a day or staying longer. If you need more data or want different options, there are plenty of other packages available on Trip.com New Zealand eSIM.
| High Speed Package | Number of Days | Price (USD) |
| 500MB Daypass | 1 day | $2.15 |
| 500MB Daypass | 5 days | $6.37 |
| 1GB Daypass | 7 days | $11.35 |
| 500MB Daypass | 10 days | $11.35 |
| 500MB Daypass | 30 days | $31.67 |
Note: Prices are as of October 2024. For the latest prices, please check Trip.com.
How to Get an New Zealand eSIM?
Getting a New Zealand eSIM is super simple. Here’s how to do it:
- Check Compatibility
First, make sure your device supports eSIM. Dial *#06# on your phone—if an "EID" number pops up, you’re good to go. - Choose Your Plan
Head over to Trip.com’s Australia eSIM page and pick a plan that fits your travel needs. There are several affordable plans to choose from, depending on how long you’ll be in New Zealand. Here are some of the popular options available. All plans come with high-speed data, and once you hit the limit, you can still use the internet at a reduced speed of 384 kbps. - Purchase and Receive QR Code
After purchasing, Trip.com will email you a QR code. This QR code is key to activating your eSIM. Be sure to set it up before you arrive in New Zealand, so you’re ready to go the moment you land.
What is the Best eSIM for New Zealand
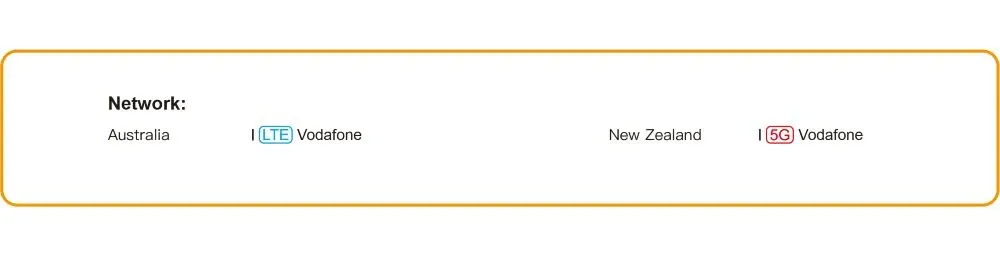
If you're looking for the best eSIM for New Zealand, Trip.com is a solid pick for its blend of affordability, reliable customer support, and great reviews from fellow travelers.
1. Cheap Pricing with Discounts
Trip.com offers some of the best deals on New Zealand eSIMs, whether you need just a day's worth of data or want coverage for an entire month. Prices start from as low as $2.15 for a 1-day 500MB daypass, and there are often discounts available. It's a budget-friendly way to stay online, keep up with social media, navigate your way around, and stay in touch with loved ones.
2. 24/7 Multilingual Support
One of the big advantages of Trip.com's eSIM is their 24/7 customer support, available in multiple languages. This means if you run into any issues, help is always just a message or call away. This service is especially reassuring when exploring a new country, as their support team is prompt, knowledgeable, and ready to assist with any troubleshooting or questions.
3. Loved by Travelers
Travelers consistently give Trip.com eSIMs glowing reviews. The ease of setting it up before you even get on the plane is a big plus. All it takes is a quick QR code scan, and you're good to go—keeping things simple so you can focus on enjoying your trip.
I received an installation email soon after placing the order, and the instructions were very detailed. Very good.
I bought an eSIM because I forgot to rent Wi-Fi for this solo trip in Cairns! I was able to connect to haste with the airport Wi-Fi. It was not a Wi-Fi luggage, and it was quite cheap and connected to the Internet, so I was saved!
Easy to install and use. Just need to turn on roaming as per the instructions as I didn’t in the beginning but after I did, it worked smoothly
How to use New Zealand eSIM
Here’s how you can use New Zealand eSIM, using iOS as an example, though the process is similar for Android with some slight differences.
How to Activate New Zealand eSIM
First, open your iPhone’s Settings and navigate to either Cellular Network, Mobile Network, or Mobile Services. The name may vary depending on your device version. Once there, select Add eSIM. You’ll be prompted to either scan a QR code (usually provided by your eSIM provider like Trip.com) or manually input the details if scanning isn’t an option. For manual entry, you will need to fill in the SM-DP+ address and Enabler code. Once everything is entered, tap Next to move forward.
After that, click on Activate eSIM and follow the prompts. You can also label your eSIM to make it easier to identify, such as calling it "New Zealand eSIM." Next, set this eSIM as your default for cellular services. Be sure to skip enabling Allow Mobile Data Switching for now to avoid any unexpected data charges.
One key step is to ensure Data Roaming is turned on. This will allow your eSIM to connect to local networks while you’re in New Zealand. If your eSIM connects to the wrong network, you can manually adjust this by going into Network Selection.
Here’s a quick table to summarize the key steps:
| Step | Action |
| Open Settings | Go to Cellular/Network/Mobile Services. |
| Add eSIM | Scan QR code or manually enter SM-DP+ details. |
| Activate eSIM | Follow the prompts and tap Activate eSIM. |
| Label eSIM | Create a custom label like "New Zealand eSIM". |
| Default Network | Set eSIM as default but don’t enable switching. |
| Enable Roaming | Make sure Data Roaming is turned on. |
Using the Internet
Once your eSIM is set up:
- For iOS users: You can disable your primary SIM (if you have one) to rely solely on your eSIM for data.
- Activate the cellular plan (on iOS) or SIM card (on Android), and you should see LTE or 4G in the corner of your screen, signaling you’re online.
- Ensure Data Roaming is switched on to stay connected to New Zealand’s networks.
- If you run into any issues, try switching Airplane Mode on and off or restart your phone.
How to Deactivate New Zealand eSIM
If you need to turn off your eSIM after your trip:
- For iOS users: Go to Settings > Cellular and switch off the cellular plan.
- For Android users: Go to SIM Card Management in Settings and turn off the eSIM.
And that's it! Just remember, once installed, the eSIM can’t be moved to another device, so keep it on the one you’ll be using throughout your trip in New Zealand.
New Zealand eSIM vs. SIM Card vs. Wi-Fi

Check the difference of eSIM, SIM and WIFI and choose the one that best for you.
| Option | Pros | Cons |
| eSIM | Easy to set up before travel, keeps original number active, no need for physical SIM | Requires compatible device, data-only plans |
| SIM Card | Local rates, comes with a local number for calls and texts | Need to purchase in person, swapping SIMs, lose access to home number |
| Free Wi-Fi | Free in many places like cafes and hotels | Unreliable connection, limited coverage, potential security issues |
| Wi-Fi Router | Great for connecting multiple devices, reliable internet | Expensive rental, extra device to carry, limited battery life |
| Roaming | No need to change anything, convenient | Extremely expensive, unpredictable charges, high data costs |
3 Benefits of Using a New Zealand eSIM

- Convenient Setup
One of the top advantages of using an eSIM for New Zealand is how easy it is to set up. You can activate everything before you even leave home, so you arrive in New Zealand already connected. No need to search for a SIM card shop at the airport or struggle with inserting a physical SIM card. A quick scan of a QR code, and you’re ready to go. This makes it a hassle-free option for travelers who want a smooth experience from the moment they land. - Keep Your Regular SIM Active
Using an eSIM means you don’t have to take out your regular SIM card. This allows you to stay connected to your usual phone number for calls and texts while using the local data plan in New Zealand. It’s particularly useful for those who need to stay reachable for work or in case of emergencies while traveling. - Wide Coverage and Reliable Speeds
eSIMs provide high-speed data coverage across New Zealand, whether you're in a city or exploring more remote areas. You can comfortably use apps like Google Maps, WhatsApp, and Instagram without worrying about slow connections. Even if you run out of high-speed data, you’ll still have internet access at a reduced speed (around 384 kbps), which is better than being completely disconnected.
3 Drawbacks of Using a New Zealand eSIM

- Compatibility Issues
One of the main downsides of eSIMs is that not all devices support them. You’ll need to check if your phone is compatible before purchasing. Most modern phones, like iPhones XR and later, Google Pixel, and newer Samsung Galaxy models, support eSIMs. However, if you have an older or budget phone, this might not be an option for you. - Data-Only Plan
eSIMs usually only offer data plans, which means you won’t receive a local New Zealand number for making calls or sending SMS messages. If you need to make local phone calls or send traditional texts, you’ll have to use apps like WhatsApp or Skype. This may not be ideal if you require a local number for work or official purposes. - One-Time Installation
Once an eSIM is installed on your device, it’s a one-time process—you can’t remove it and reinstall it on another device. If it’s accidentally deleted, you’ll have to buy a new one. It’s important to carefully install the eSIM and ensure you're committed to using the same device for your entire trip to avoid any issues.